Help Centre

Help Centre
We love our customers and we are here to help.
If you need help with your new website or email accounts, let us know:
1300 090 401 / 0468 419 333
[email protected]
Website Support
- How do I update text on my website?
- How do I update images on my website?
- How do I update my contact details on my website?
- How do I update the menu on my website?
- How do I add another page to my website?
- How do I delete a page on my website?
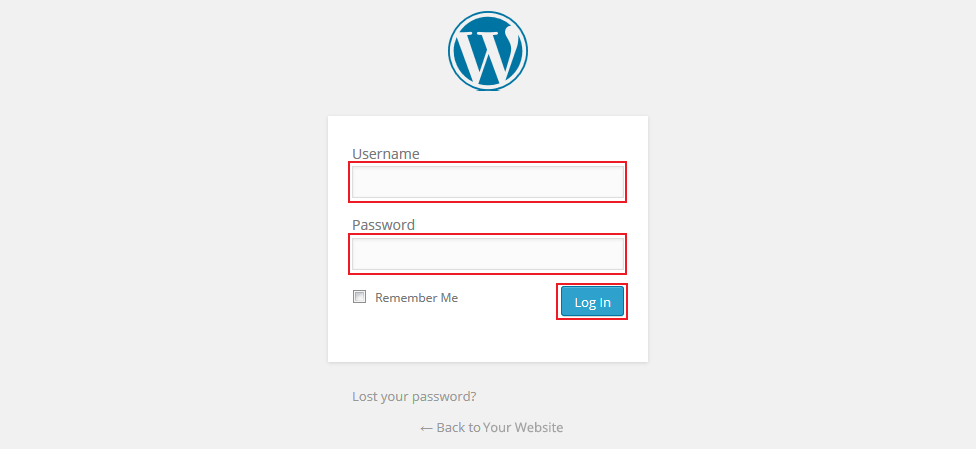
1/6. Login with your username and password on www.yourwebsite.com.au/wp-admin.
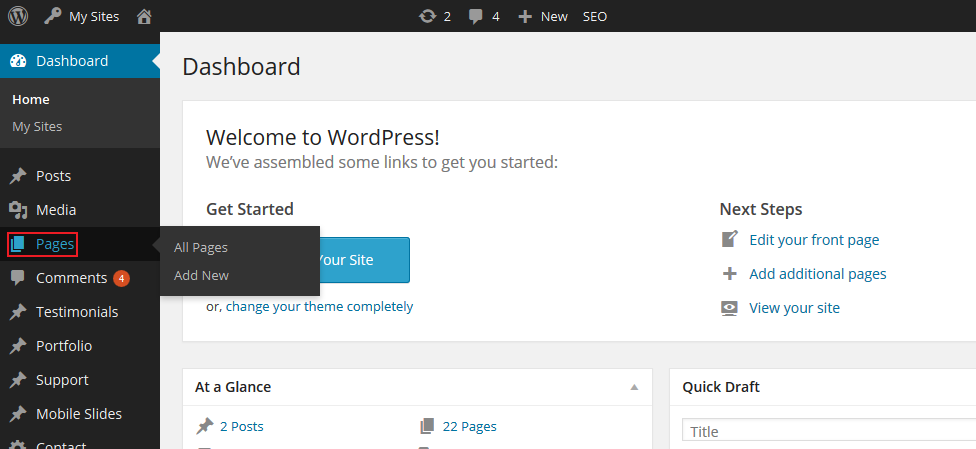
2/6. Click posts if you want to update a text from a post.

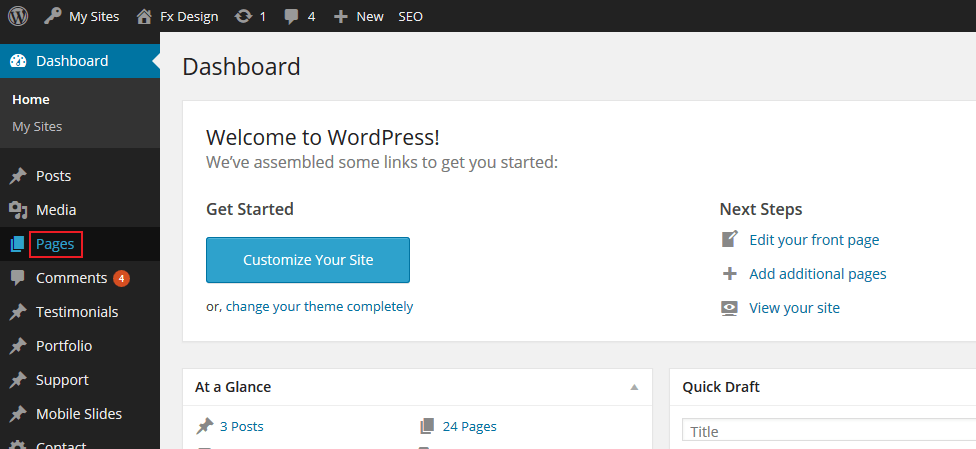
3/6. Click pages if you want to update a text from a page.
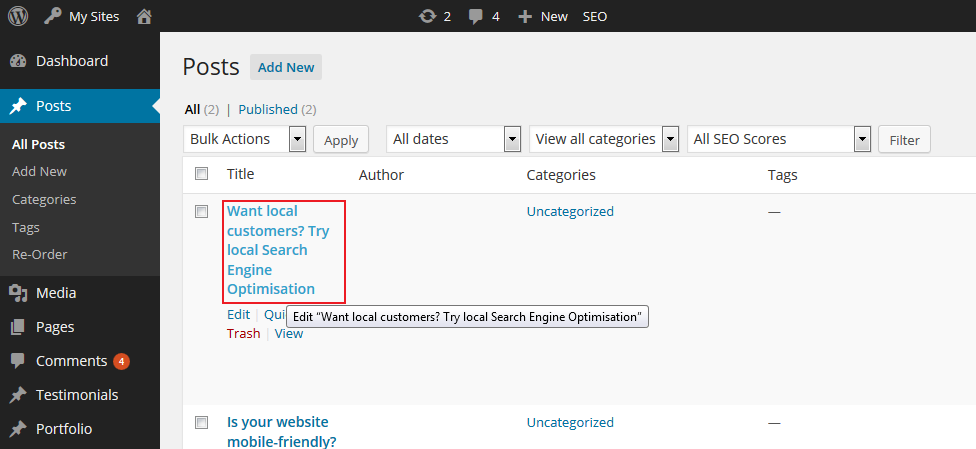
4/6. Select a page/post that needs to be updated with text.
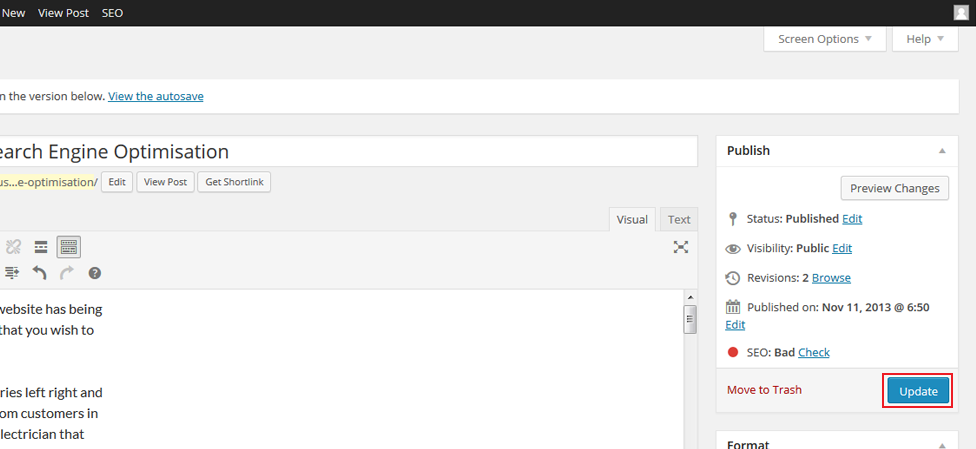
5/6. Under the text tab, select and edit the text you wanted to update.
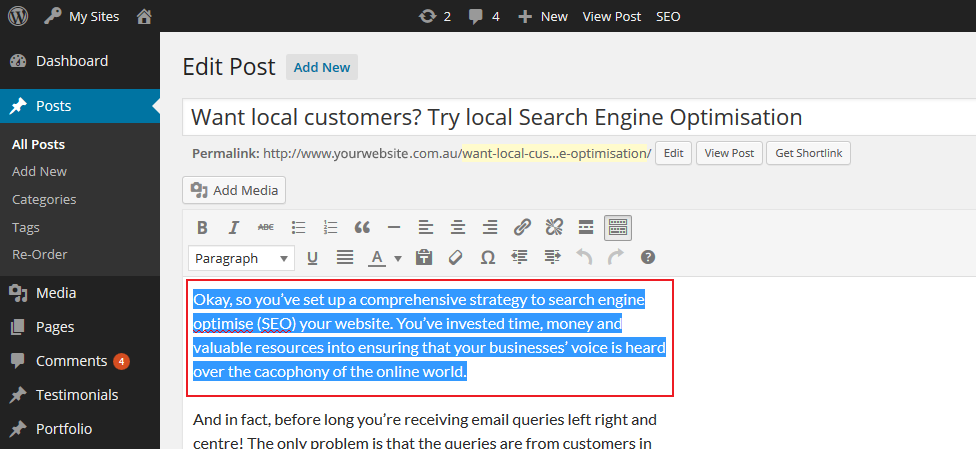
6/6. Once the text is updated, click update to save the changes you’ve made. Wait until the page has finished reloading.
1/10. Login with your username and password on www.yourwebsite.com.au/wp-admin.

2/10. Click posts if you want to update an image from a post.

3/10. Click pages if you want to update an image from a page.

4/10. Select a page/post that needs to be updated with an image.

5/10. Select the image you wanted to update.

6/10. Under the permalink section, click the add media button.

7/10. Select an image to be used for updating the image of a page/post or upload a new image by clicking the upload files tab.

8/10. Once you’re done selecting an image, link it to none under attachment display settings.

9/10. Click the insert into post button.

10/10. Click the update button and wait until the page has finished reloading.

1/5. Login with your username and password on www.yourwebsite.com.au/wp-admin.

2/5. Point your cursor to appearance and click widgets.

3/5. Find the widget that contains a contact us text. In this case, it’s under contact us sidebar.

4/5. Click the text tab and edit the text that you wanted to update.

5/5. Once you’re done updating the text, click the save button to update your contact details.

1/10. Login with your username and password on www.yourwebsite.com.au/wp-admin.

2/10. Point your cursor to appearance and click menus.

3/10. Select a menu to edit.

4/10. Click the select button.

5/10. If you like to add a page to the menu, select a page then click the add to menu button.

6/10. If you like to add a custom menu item, click the links tab.

7/10. Add a link to the URL box and add a name for the custom menu item inside the link text box. Then click the add to menu button.

8/10. If you like to edit a text, click the dropdown button of the menu item.

9/10. If you like to change the name of the menu item, edit the text under the navigation label. You can also change the link of the menu item by editing the text under the URL.

10/10. Click the save menu button to update the menu. Wait until the page has finished reloading.

1/4. Login with your username and password on www.yourwebsite.com.au/wp-admin.
2/4. Point your cursor to pages and click add new.

3/4. Add a title and content to your new page.

4/4. Click publish to save the new page you’ve created. Wait until the page has finished reloading.

1/5. Login with your username and password on www.yourwebsite.com.au/wp-admin.
2/5. Click pages.
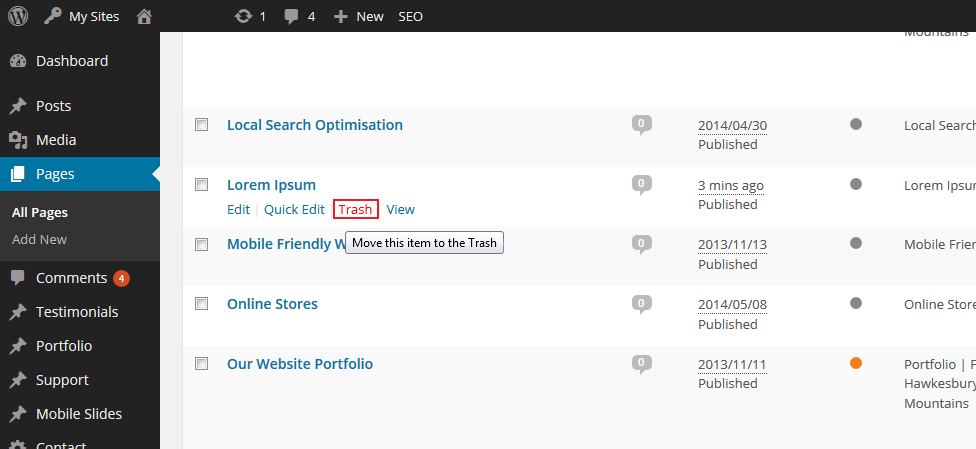
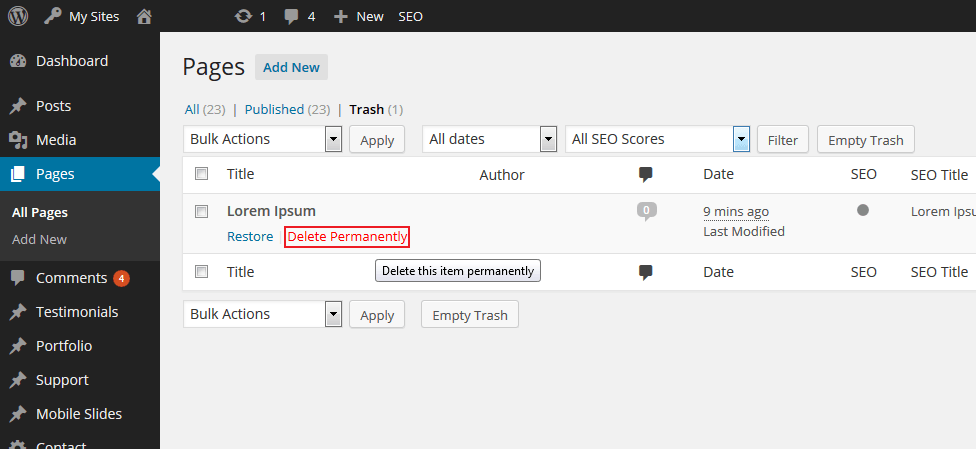
3/5. Point your cursor to the page you wanted to delete and click trash.
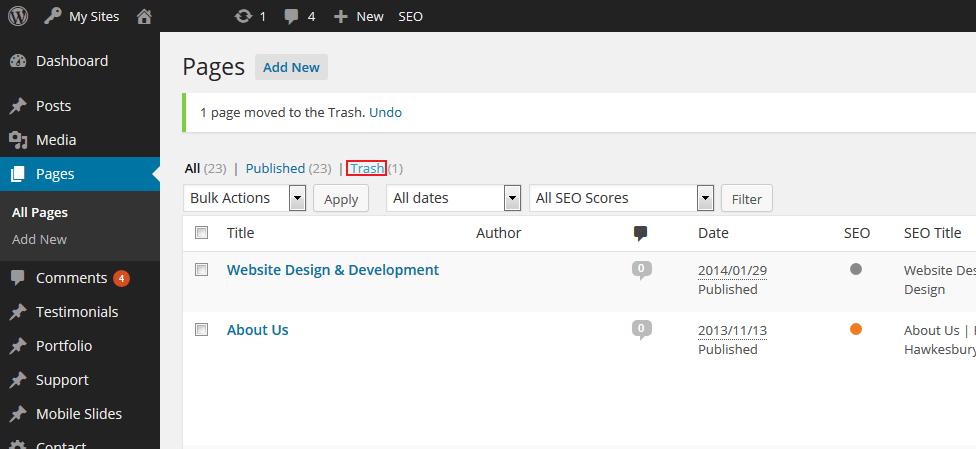
4/5. If you want to delete the page permanently, click trash next to the published text.
5/5. Point your cursor to the page and click delete permanently. Wait until the page has finished reloading.
Email Support
- How do I set up my email in Microsoft Outlook 2013/365?
- How do I set up my email in Microsoft Outlook for Mac 2011?
- How do I set up my email in Microsoft Outlook 2010?
- How do I set up my email in Apple Mail?
- How do I set up my email on my Android device?
- How do I set up my email on my iPhone or iPad?
- How do I set up my FX mail for Microsoft Outlook 2013/365 ?
- How do I set up my FX mail account in Apple Mail?
- How do I setup my email account in Windows Live?
- How do I set up my email account using IMAP for Apple iPhone for Google mail?
1/13. Launch Outlook 2013 from your desktop or programs list by double clicking it.

2/13. Click “Next” on welcome screen.
Note: If you’re already configured an email account in the past and will just need to add another one, skip to Step 5.

3/13. On the next window, choose ”Yes” to connect an email account. Then click “Next”.

4/13. Then on the set up window that pops up, select “Manual Set up or additional server types”. Then click “Next”.

5/13. Go to File tab, then click on Add Account.

6/13. Then on the set up window that pops up, select “Manual Set up or additional server types”. Then click “Next”.

7/13. In the next section, select “POP or IMAP” then click “Next”.

8/13. Provide the following details like Name, Email Address, and account type: IMAP/POP.
Note: On the Incoming mail server section, insert the appropriate mail server for your email provider on the (e.g. for Google mail – “imap.gmail.com” ). On the Outgoing mail server section, insert the appropriate smtp server for your email provider on the (e.g. For Google mail- “smtp.gmail.com”).

9/13. Click “More Settings” and click “Outgoing Server” tab. Check the box “My outgoing server(SMTP) requires authentication”.

10/13. Then go “Advanced” and provide the following details like your Incoming server port and outgoing server from your email configurations provided otherwise use defaults then click “Ok” when finish.

11/13. A window will suddenly pops up showing the testing of the email account.

12/13. Click “Close” if the testing finished and status set to “Completed” (Refer to image below.)
Note: If test has not completed or if it prompts with “Error”, check the Error’s Tab and see the problem. Go back to STEP 7 or check if passwords provided are correct.

13/13. Finally, you’re all set so you can click “Finish” to start using your email in Outlook 2013.

1/6. Open Microsoft Outlook from your applications or dock.

2/6. Select “Tools” and then click “Accounts”.

3/6. On the “Add-up account” pop-up menu, select “Email” otherwise select “Exchange” if your company requires exchange email.

4/6. Provide your email address and password. Click “Add Account” if done.
Note: If Outlook recognizes your e-mail provider (for example, Windows Live Hotmail), the Configure automatically check box remains selected, and Outlook attempts to configure your server information automatically. To enter the server information manually, clear the Configure automatically check box.

5/6. Fill up the “Account details” required like Full Name, email address and etc.

6/6. Now you’re get to go in using your outlook email in Mac 2011.

1/12. Launch Outlook 2010 from your desktop or programs list by double clicking it.

2/12. Click “Next” as the Outlook 2010 Startup window appears.

3/12. On the next window, it will ask if you want to manually configure your email account. Select “Yes” and then click “Next”.

4/12. On the Adding New Account window, select “manually configure server settings or additional server types” then click “Next”.

5/12. The next window, choose “Internet Email” then click “Next”.

6/12. Provide the following details about your email account.

7/12. On the Server Information> Account type, choose “IMAP” on the drop down list then provide the Incoming mail server & Outgoing mail server settings.

8/12. Go to “More settings”, then in the Outgoing Server tab check “My outgoing server (SMTP) requires authentication”.

9/12. Then select the “Advanced” tab and be sure to provide the following details and click “OK”. Incoming server: 993; Incoming server encrypted connection: SSL; Outgoing server encrypted connection TLS; Outgoing server: 587.

10/12. After setting those details, click “Next”.

11/12. After clicking next, it will try to test the Account Settings. Click “Close” to continue.
Note: Make sure that the status must show as “Completed otherwise, go to “Errors” tab then refer with the given error or go back to step 6 to verify if details are correct.

12/12. Finally, close the window and then click “Finish”.

1/6. Start Mac Mail, click Mail menu and go to “Preferences”.

2/6. Select “Accounts” tab on the top menu then click the plus(+) button on the bottom left of the window to start the process of setting up your email.

3/6. Provide details for the initial setup window.
Note: Full Name: e.g. James Dean, Email Address: e.g. [email protected], Password: your default email password.

4/6. For the next window setting the Incoming Mail Server, select on account type “IMAP”. Provide the description for example “My IMAP”. Then set your Incoming Mail Server like as provided below, using google mail server if you’re setting u for Gmail. Indicate also your Username and Password then click “Continue”.

5/6. On the Outgoing Mail Server, fill the following details required. Tick the Use only this server & Use Authentication check boxes . Outgoing Mail Server: e.g. “smtp.googlemail.com”

6/6. Once you click Continue, a summary of your account setting will appear. Check the Take account online then click “Create” to finalize the process.

1/9. Tap “Email” app on your smartphone
homepage > email

2/9. NEW EMAIL: Add your email on “account setup”
homepage > email
EXISTING EMAIL: Go to settings and select “add account” then add your email on “account settings
email > settings > add account

3/9. Select “IMAP” account type
email > account setup > account type

4/9. Type in your email password
email > account setup > account type > login

5/9. Type in your email, password, and server.
Example:
Username: John Doe
Password: xxxxxxx
Server: mx.mmedia.zone
email > account setup > account type > login

6/9. Select SSL security type (Accept all certificates)
email > account setup > account type > login > server settings

7/9. Add the server again: mx.mmedia.zone
email > account setup > account type > login > server settings > outgoing server settings

8/9. Select your desired account options and click NEXT
email > account setup > account type > login > server settings > outgoing server settings > account options

9/9. Give your account a name and click FINISH
You are done setting up your email!
email > account setup > account type > login > server settings > outgoing server settings > account options

1/11. Tap “Settings” icon on your iPhone
homepage > settings

2/11. Scroll down and select the “mail” settings
settings > mail

3/11. Tap “accounts”
settings > mail > accounts

4/11. Scroll down and tap “add account”
settings > mail > accounts > add account

5/11. Tap “other” when selecting which type of account to add
settings > mail > accounts > add account > other

6/11. Tap “add mail account”
settings > mail > accounts > add account > other > add mail account

7/11. Fill in your NAME, EMAIL, PASSWORD and click “next”
settings > mail > accounts > add account > other > add mail account

8/11. Fill in your INCOMING MAIL SERVER details.
Example:
Host: mail.mmedia.zone
Username: John Appleseed
Password: xxxxxxx
settings > mail > accounts > add account > other > add mail account

9/11. Fill in your OUTGOING MAIL SERVER details.
Example:
Host: mail.mmedia.zone
Username: John Appleseed
Password: xxxxxxx
settings > mail > accounts > add account > other > add mail account

10/11. If an SSRI security certificate comes up, TRUST it by clicking DETAILS, and TRUST.
settings > mail > accounts > add account > other > add mail account


11/11. You are DONE setting up your email account on your iPhone!

1/12. Launch Outlook 2013 from your desktop or programs list by double clicking it.
Note: If you’re already configured an email account in the past and will just need to add another one, skip to step 5.

2/12. Click “Next” on welcome screen.

3/12. On the next window, choose ”Yes” to connect an email account. Then click “Next”.

4/12. Select “Manual Set up or additional server types”.

5/12. Go to File tab, then click on Add Account.

6/12. Then on the set up window that pops up, select “Manual Set up or additional server types”.

7/12. In the next section, select “POP or IMAP” then click “Next”.

8/12. Provide the following details like Name, Email Address, and account type: IMAP/POP.
Note: On the Incoming mail server section, insert the appropriate mail server of your email provider (e.g.”mail.c9online.com.au” ). On the Outgoing mail server section, insert the appropriate smtp server of your email provider (e.g. “mail.c9online.com.au”).

9/12. Click “More Settings” and click “Outgoing Server” tab. Check the box “My outgoing server(SMTP) requires authentication”.

10/12. Then go to “Advanced” and provide the Incoming server port and outgoing server from your email configurations otherwise use defaults then click “Ok” when finish.

11/12. Click “Next” then a window will pop up showing the testing of the email account. Click “Close” once the test is completed.
Note: If test has not completed or if it prompts with “Error”, check the Error’s Tab and see the problem. Go back to Step 7 or check if passwords provided are correct.

12/12. Finally, you’re all set so you can click “Finish” to start using your email in Outlook 2013.
1/6. Start Apple Mail, click Mail menu and go to “Preferences”.

2/6. Select “Accounts” tab on the top menu then click the plus(+) button on the bottom left of the window to start the process of setting up your email.

3/6. Provide details for the initial setup window. Then click “Continue”.
Note: Full Name: e.g. John Hanes, Email Address: e.g. [email protected], Password: your default email password.

4/6. For the next window setting the Incoming Mail Server, select on account type “IMAP”. Provide the description for example “My IMAP”. Then set your Incoming Mail Server like as provided below, using FX mail server if you’re setting up for the provided FX mail. Indicate also your Username and Password then click “Continue”.

5/6. On the Outgoing Mail Server, fill the following details required. Tick the Use only this server & Use Authentication check boxes. After providing the details, click “Continue”. Outgoing Mail Server: e.g. “mail.yourdomain.com”

6/6. Once you click Continue, a summary of your account setting will appear. Check the Take account online then click “Create” to finalize the process. Now you can send and receive mail in your Apple Mail from your FX mail account.

1/7. Open Windows Live program by clicking from the program list in your Windows start menu.

2/7. Start adding your email account by going to “Account” tab and click “Email”.

3/7. A window will pop up and will require you to provide the following details to add your email account. Type your email address, password and username then click “Next”.

4/7. On this next window, it will require the server settings that needed for your email setup. Choose “IMAP” on the server type drop down list.

5/7. Now we need to manually enter our settings similar to the following. Under the Server Information section verify the following.
Note: Remember to tick the Require a secure connection checkbox for both Incoming mail server and Outgoing mail server.

6/7. After providing all the required details, click “Next”.

7/7. Click “Finish.” Now you’re set to go for Windows live mail.

1/11. Go and tap “Settings” icon in your iPhone.

2/11. Under Settings, tap on “Mail, Contacts, Calendar” option.

3/11. Tap “Add Account” option.

4/11. Select “other” from the menu.

5/11. Under Mail Option, tap “Add Mail Account”.

6/11. Provide email details e.g. Name, Email, Password. Click “Next” then it will try to verify the account.
Note: Email: e.g. [email protected]

7/11. After the verification, choose “IMAP” button then provide the following details like Name, Address, & Description.

8/11. Set the “Incoming mail Server” & “Outgoing mail server”. Then click “NEXT” to verify the settings.

9/11. As it completes the verification, you can configure “Mail” and “Notes” to be sync with your account for iPhone.

10/11. Enable or disable “Mail” & “Notes” to sync with the Google mail account then tap the “Mail” in the navigation section.

11/11. You should see your Inboxes and some other email accounts that you’ve added.

Social Media Support
- How to share a blog post on Facebook
- How to report a problem on Instagram
- How to add FX Web Studio as Facebook page admin
- How to post a Facebook Story
1/5. Copy the blog link you want to share on Facebook.
2/5. Go to your Facebook News Feed and paste the link on your publisher box.

3/5. Wait for the publisher box to ‘fetch’ the preview of your blog link.

4/5. Once the preview is shown, you can then delete the blog link on the publisher box and write a short caption.

5/5. Click the ‘Share’ button.
1/3. Go to your Instagram profile and click the Settings on the upper right corner.


2/3. After clicking on Settings, go to the Support option and click Report a problem.

3/3. After clicking Report a problem, click on Something isn’t working. A pop up will appear and you can then send Instagram your issue.


1/4. Click “Settings” on the left side of your page.

2/4. On “Settings”, click “Page Roles”

3/4. Under the “Assign a New Page Role”, type in the email address [email protected] and then click “add”. Make sure the role is set as “Admin” and not any other type of role.

4/4. Inform us if you’ve added us as and we’ll accept the request.
For Desktop:
*In order to do this, you should have Business Manager set up for your page.
1. Go to Creator Studio (https://business.facebook.com/creatorstudio/home)
2. Once you’re on Creator Studio, click the “Add Story” button on the upper right side of the page.

3. After clicking on “Add story”, a window will appear on the right side of the screen asking you to select a page (This is if you have multiple pages on your Business Manager.) Scroll through the list and select a page.

4. When you click a page, you will be redirected to another page asking you to choose between posting a photo or creating a text story.

5. Choose between the two. Once you’re done, click “Share to story”.

For Mobile:
1. Using your personal account, go to your Facebook page.
2. Once you’re on your page, click “Create story”.

3. Choose what type of story you’ll post. You can choose to post an image, boomerang, etc. from your camera roll or take the photo directly from this window.

4. Once you’re done choosing the type of story you’ll post, click “Share to Story”.


